k8s部署Prometheus+Grafana
主机名
ip1(NAT)
系统
磁盘
内存
master1
192.168.48.101
Centos7.9
100G
4G
master2
192.168.48.102
Centos7.9
100G
4G
master3
192.168.48.103
Centos7.9
100G
4G
node01
192.168.48.104
Centos7.9
100G
6G
node02
192.168.48.105
Centos7.9
100G
6G
做这个之前你要拥有一个k8s集群,参考以下教程
K8S高可用集群(内部etcd) - 严千屹博客 (qianyios.top)
K8S高可用集群(外部etcd) - 严千屹博客 (qianyios.top)
部署Prometheus
创建命名空间
操作节点[master1]
1 kubectl create namespace prometheus-work
部署Prometheus deploy
操作节点[master1]
1
2
3
4
5
6
7
8
9
10
11
12
13
14
15
16
17
18
19
20
21
22
23
24
25
26
27
28
29
30
31
32
33
34
35
36
37
38
39
40
41
42
43
44
45
46
47
48
49
50
51
52
53
54
55
cat >prome_deploy.yml<< "EOF" apiVersion: apps/v1 kind: Deployment metadata: name: prometheus namespace: prometheus-work labels: app: prometheus spec: selector: matchLabels: app: prometheus template: metadata: labels: app: prometheus spec: securityContext: runAsUser: 0 serviceAccountName: prometheus containers: - image: prom/prometheus:v2.30.2 name: prometheus args: - "--config.file=/etc/prometheus/prometheus.yml" - "--storage.tsdb.path=/prometheus" - "--storage.tsdb.retention.time=24h" - "--web.enable-admin-api" - "--web.enable-lifecycle" ports: - containerPort: 9090 name: http volumeMounts: - mountPath: "/etc/prometheus" name: config-volume - mountPath: "/prometheus" name: data resources: requests: cpu: 100m memory: 512Mi limits: cpu: 100m memory: 512Mi volumes: - name: data persistentVolumeClaim: claimName: prometheus-data - name: config-volume configMap: name: prometheus-config EOF kubectl apply -f prome_deploy.yml
部署Prometheus service
操作节点[master1]
1
2
3
4
5
6
7
8
9
10
11
12
13
14
15
16
17
18
19
cat> prome_svc.yml<< "EOF" apiVersion: v1 kind: Service metadata: name: prometheus namespace: prometheus-work labels: app: prometheus spec: selector: app: prometheus type: NodePort ports: - name: web port: 9090 targetPort: http EOF kubectl apply -f prome_svc.yml
部署configmap
操作节点[master1]
1
2
3
4
5
6
7
8
9
10
11
12
13
14
15
16
17
18
19
cat > prome_cfg.yml << "EOF" apiVersion: v1 kind: ConfigMap metadata: name: prometheus-config namespace: prometheus-work data: prometheus.yml: | global: scrape_interval: 15s scrape_timeout: 15s scrape_configs: - job_name: 'prometheus' static_configs: - targets: ['localhost:9090'] EOF kubectl apply -f prome_cfg.yml
部署PV,PVC
操作节点[node01]
1
2
#在node01节点上执行 mkdir /data/k8s/prometheus -p
操作节点[master1]
1
2
3
4
5
6
7
8
9
10
11
12
13
14
15
16
17
18
19
20
21
22
23
24
25
26
27
28
29
30
31
32
33
34
35
36
37
38
39
40
41
42
43
44
cat > prome_pvc.yml << "EOF" apiVersion: v1 kind: PersistentVolume metadata: name: prometheus-local labels: app: prometheus spec: accessModes: - ReadWriteOnce capacity: storage: 5Gi storageClassName: local-storage local: path: /data/k8s/prometheus nodeAffinity: required: nodeSelectorTerms: - matchExpressions: - key: kubernetes.io/hostname operator: In values: - node01 persistentVolumeReclaimPolicy: Retain --- apiVersion: v1 kind: PersistentVolumeClaim metadata: name: prometheus-data namespace: prometheus-work spec: selector: matchLabels: app: prometheus accessModes: - ReadWriteOnce resources: requests: storage: 5Gi storageClassName: local-storage EOF kubectl apply -f prome_pvc.yml
配置rabc
操作节点[master1]
1
2
3
4
5
6
7
8
9
10
11
12
13
14
15
16
17
18
19
20
21
22
23
24
25
26
27
28
29
30
31
32
33
34
35
36
37
38
39
40
41
42
43
44
45
46
47
48
49
50
51
52
53
54
55
56
57
58
59
60
cat > prome_rabc.yml << "EOF" apiVersion: v1 kind: ServiceAccount metadata: name: prometheus namespace: prometheus-work --- apiVersion: rbac.authorization.k8s.io/v1 kind: ClusterRole metadata: name: prometheus rules: - apiGroups: - "" resources: - nodes - services - endpoints - pods - nodes/proxy verbs: - get - list - watch - apiGroups: - "extensions" resources: - ingresses verbs: - get - list - watch - apiGroups: - "" resources: - configmaps - nodes/metrics verbs: - get - nonResourceURLs: - /metrics verbs: - get --- apiVersion: rbac.authorization.k8s.io/v1 kind: ClusterRoleBinding metadata: name: prometheus roleRef: apiGroup: rbac.authorization.k8s.io kind: ClusterRole name: prometheus subjects: - kind: ServiceAccount name: prometheus namespace: prometheus-work EOF kubectl apply -f prome_rabc.yml
查看部署的Prometheus服务
操作节点[master1]
1
2
3
4
5
6
7
8
9
10
11
12
13
14
15
[root@master1 ~]# kubectl get pod,svc,configmap,sa -n prometheus-work NAME READY STATUS RESTARTS AGE pod/prometheus-db4b5c549-6gb7d 1/1 Running 0 4m39s NAME TYPE CLUSTER-IP EXTERNAL-IP PORT(S) AGE service/prometheus NodePort 10.103.99.200 <none> 9090:30512/TCP 15m NAME DATA AGE configmap/kube-root-ca.crt 1 17m configmap/prometheus-config 1 14m NAME SECRETS AGE serviceaccount/default 0 17m serviceaccount/prometheus 0 12m
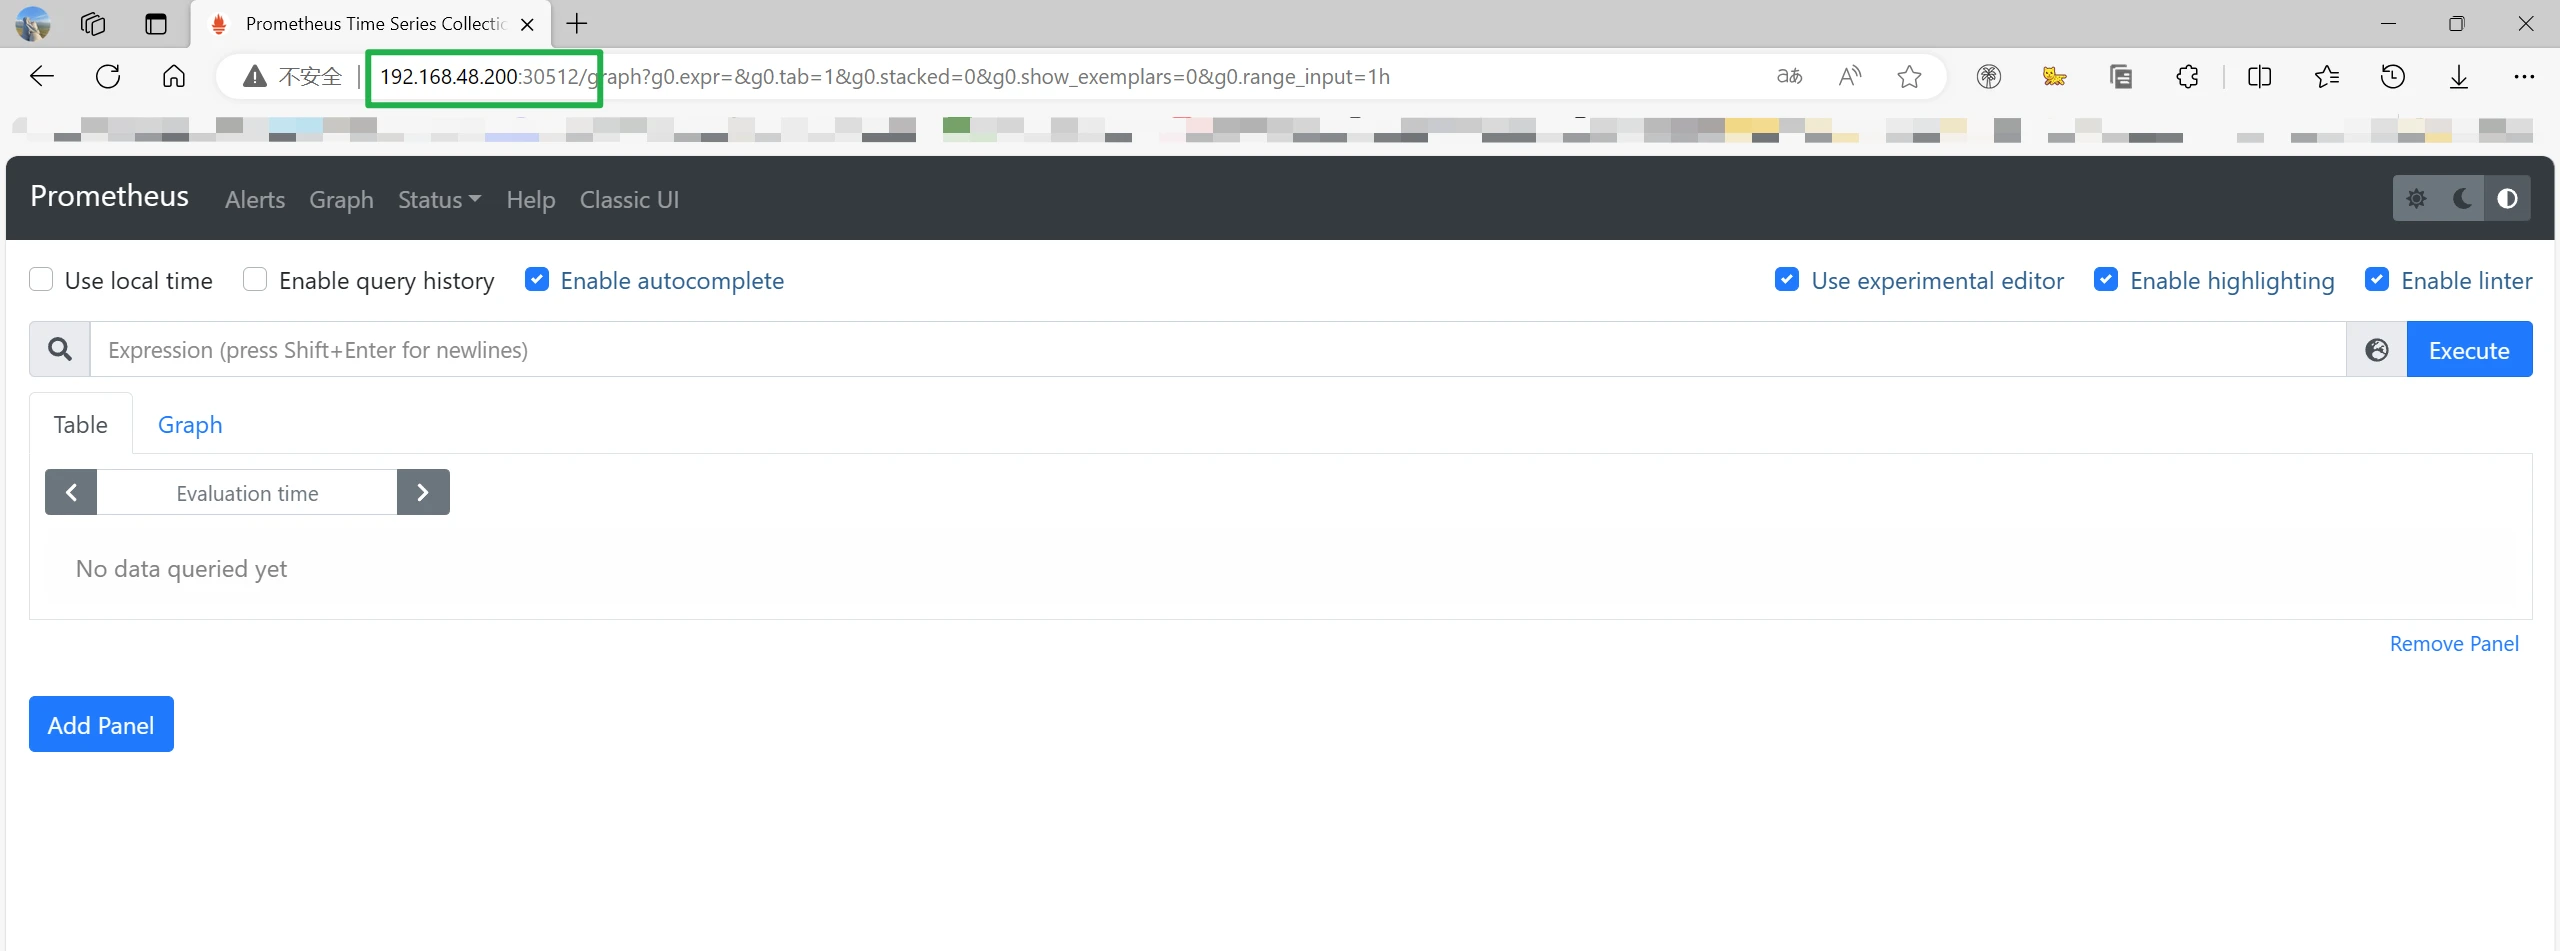
在浏览器访问Prometheus
部署grafana
部署deployment
1
2
3
4
5
6
7
8
9
10
11
12
13
14
15
16
17
18
19
20
21
22
23
24
25
26
27
28
29
30
31
32
33
34
35
36
37
38
39
40
41
42
43
44
45
46
47
48
cat >grafana.yml <<"EOF" kind: Deployment apiVersion: apps/v1 metadata: labels: app: grafana name: grafana namespace: prometheus-work spec: replicas: 1 revisionHistoryLimit: 10 selector: matchLabels: app: grafana template: metadata: labels: app: grafana spec: securityContext: runAsNonRoot: true runAsUser: 10555 fsGroup: 10555 containers: - name: grafana image: grafana/grafana:8.4.4 imagePullPolicy: IfNotPresent env: - name: GF_AUTH_BASIC_ENABLED value: "true" - name: GF_AUTH_ANONYMOUS_ENABLED value: "false" readinessProbe: httpGet: path: /login port: 3000 volumeMounts: - mountPath: /var/lib/grafana name: grafana-data-volume ports: - containerPort: 3000 protocol: TCP volumes: - name: grafana-data-volume emptyDir: {} EOF kubectl apply -f grafana.yml
部署svc
1
2
3
4
5
6
7
8
9
10
11
12
13
14
15
16
17
18
19
cat >grafana_svc.yml<<"EOF" kind: Service apiVersion: v1 metadata: labels: app: grafana name: grafana-service namespace: prometheus-work spec: ports: - port: 3000 targetPort: 3000 selector: app: grafana type: NodePort EOF kubectl apply -f grafana_svc.yml
查看服务
1
2
3
4
5
6
7
[root@master1 ~]# kubectl get pod,svc -n prometheus-work |grep grafana pod/grafana-5d475d9d7-ctb2t 1/1 Running 0 5m18s service/grafana-service NodePort 10.99.157.212 <none> 3000:31163/TCP 5m12s #查看grafana的pod在哪个节点 [root@master1 1]# kubectl describe pod -n prometheus-work grafana-5d475d9d7-ctb2t | grep Node: Node: node02/192.168.48.105 [root@master1 1]#
访问页面http://192.168.48.105:31163
首次登录grafana,用户名和密码都是admin ,登陆之后会要求修改admin的密码,也可以不修改
监控开始
以下测试均已监控node01来做测试
GitHub - prometheus/node_exporter: Exporter for machine metrics
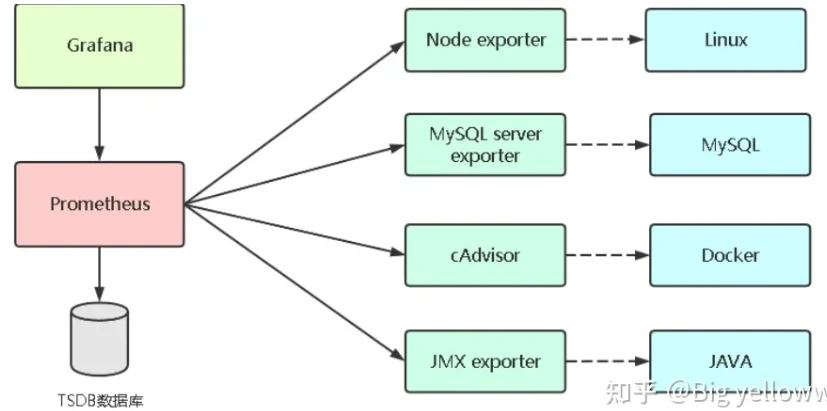
监控linux服务器 主要监控指标:
安装采集器
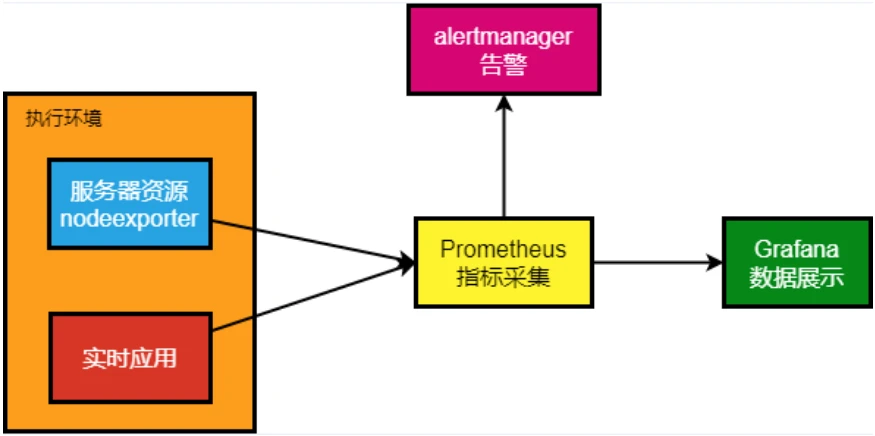
从上图得知监控linux需要使用Node exporter 采集器
下载Node exporter采集器
操作节点[node01]
1
2
wget -P /usr/local/ https://github.com/prometheus/node_exporter/releases/download/v1.7.0/node_exporter-1.7.0.linux-amd64.tar.gz #也可以自己先下载上传到/usr/local/ 下
1
2
3
4
5
cd /usr/local/ tar -xvf node_exporter-1.7.0.linux-amd64.tar.gz mv node_exporter-1.7.0.linux-amd64 node_exporter cd /usr/local/node_exporter ./node_exporter
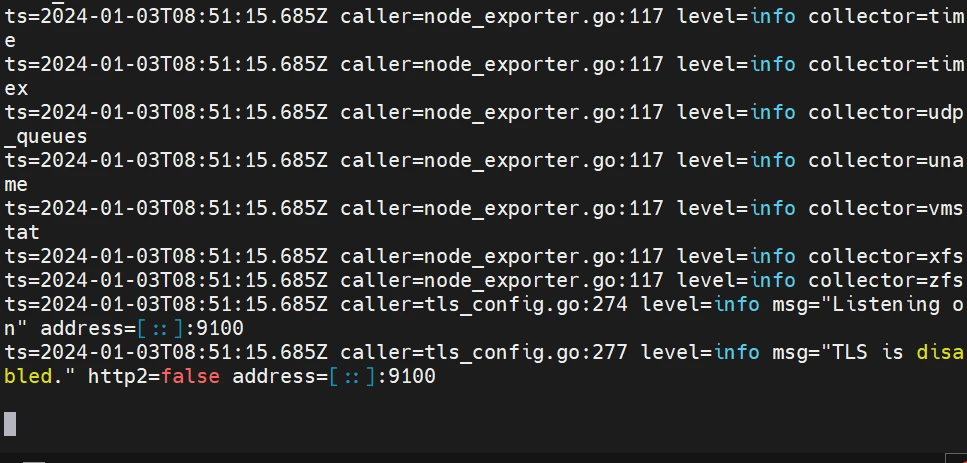
出现以下没关系
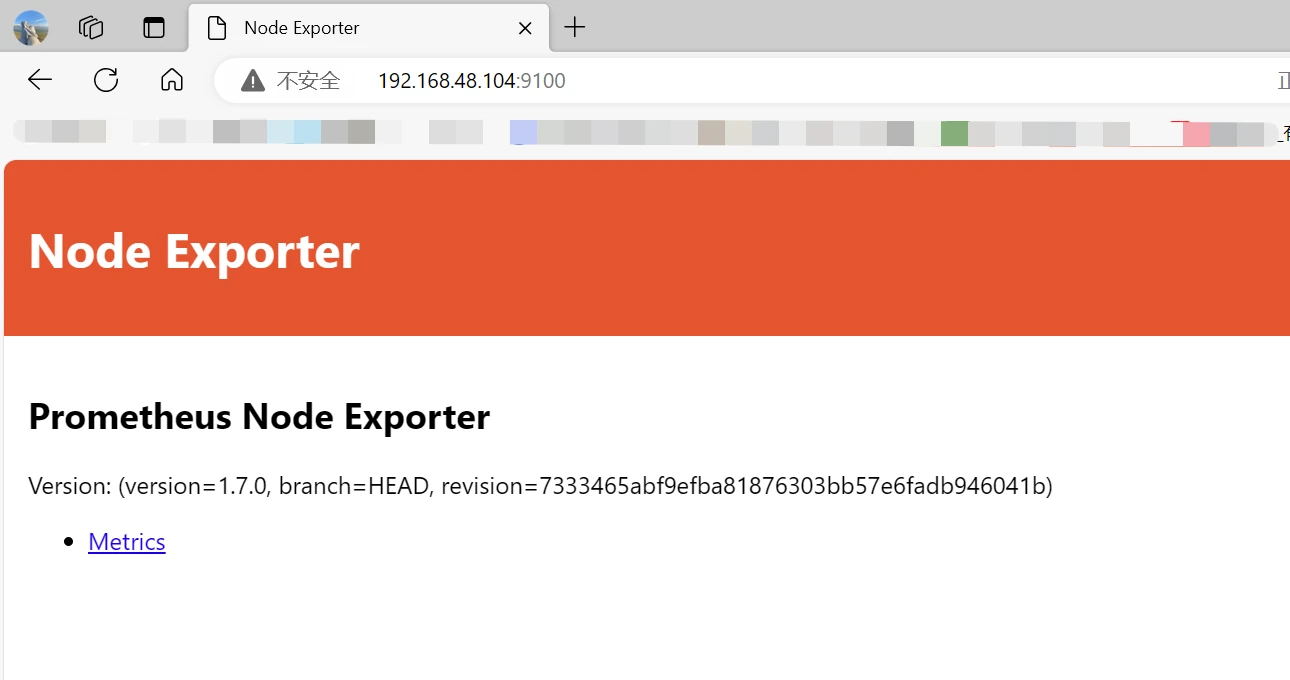
访问采集器
1 http://192.168.48.104:9100/
设置采集器开机自启动
加入systemd管理
1
2
3
4
5
6
7
8
9
10
11
12
13
14
15
16
17
18
cat > /usr/lib/systemd/system/node_exporter.service << "EOF" [Unit] Description=node_exporter [Service] #ExecStart=/usr/local/node_exporter/node_exporter --web.config=/usr/local/node_exporter/config.yml ExecStart=/usr/local/node_exporter/node_exporter ExecReload=/bin/kill -HUP $MAINPID KillMode=process Restart=on-failure [Install] WantedBy=multi-user.target EOF # 重新加载 systemctl daemon-reload # 启动 systemctl start node_exporter # 加入开机自启 systemctl enable node_exporter
Prometheus配置
配置文件修改
操作节点[master1]
1
2
3
4
5
6
7
8
9
10
11
12
13
14
15
16
17
18
19
20
21
22
在Prometheus配置文件添加被监控端 cat > prome_cfg.yml << "EOF" apiVersion: v1 kind: ConfigMap metadata: name: prometheus-config namespace: prometheus-work data: prometheus.yml: | global: scrape_interval: 15s scrape_timeout: 15s scrape_configs: - job_name: 'prometheus' static_configs: - targets: ['localhost:9090'] - job_name: 'test' static_configs: - targets: ['192.168.48.104:9100'] EOF kubectl apply -f prome_cfg.yml
热加载更新
操作节点[node01] 加的是哪个节点就在哪个节点进行热加载
1
2
#实现Prometheus热更新 curl -X POST http://192.168.48.104:30512/-/reload
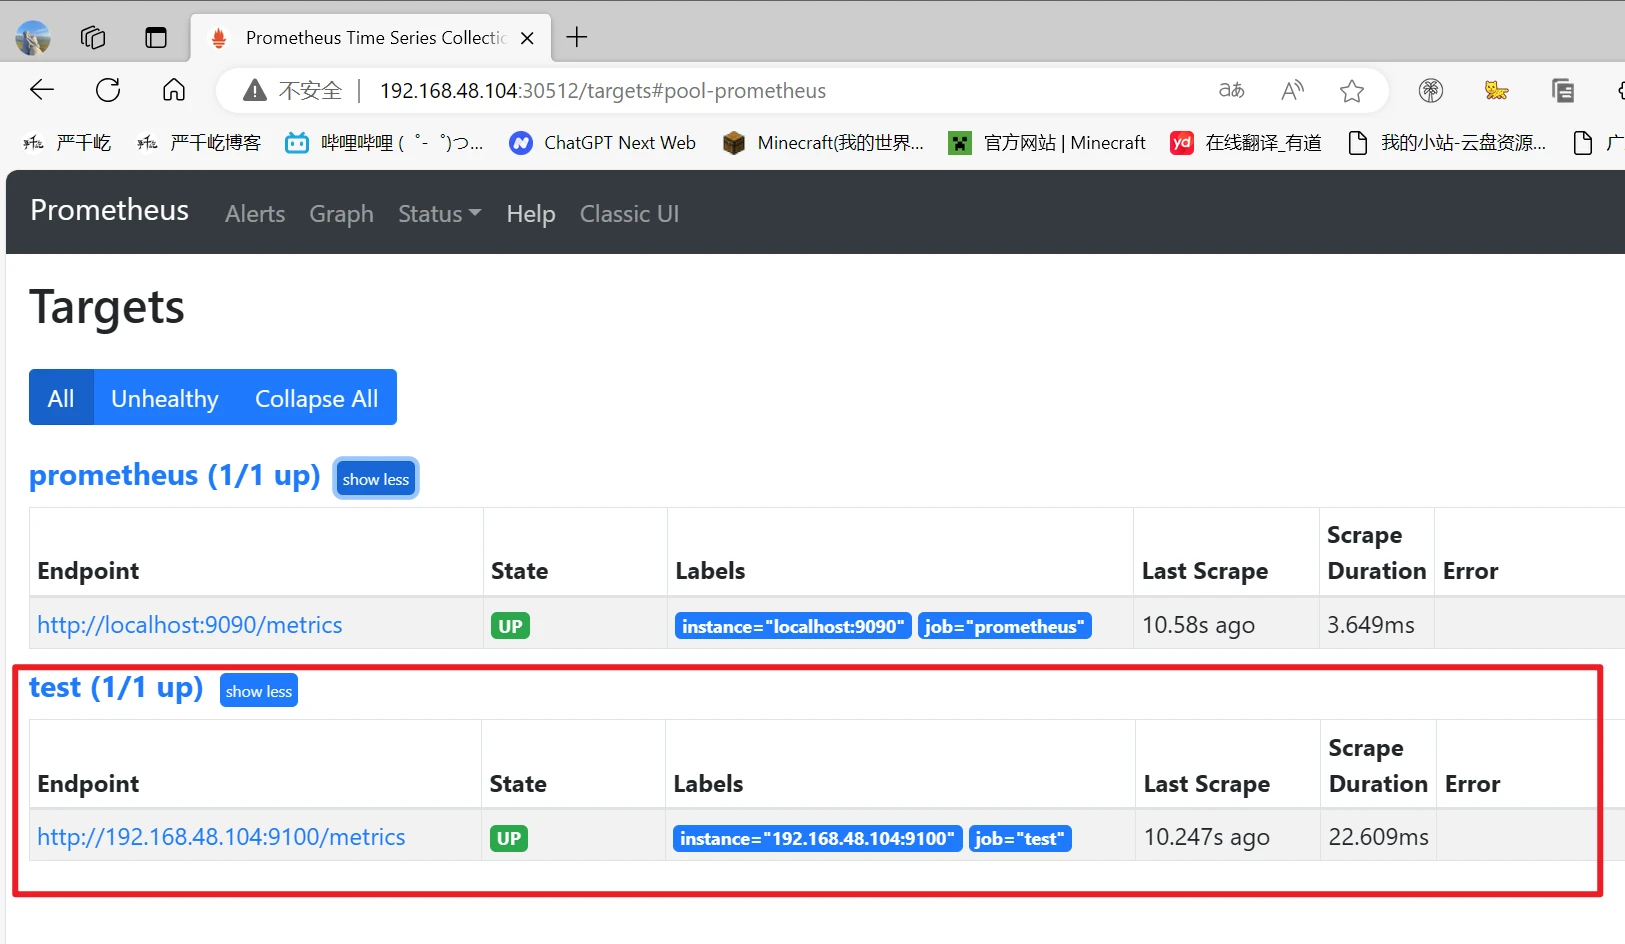
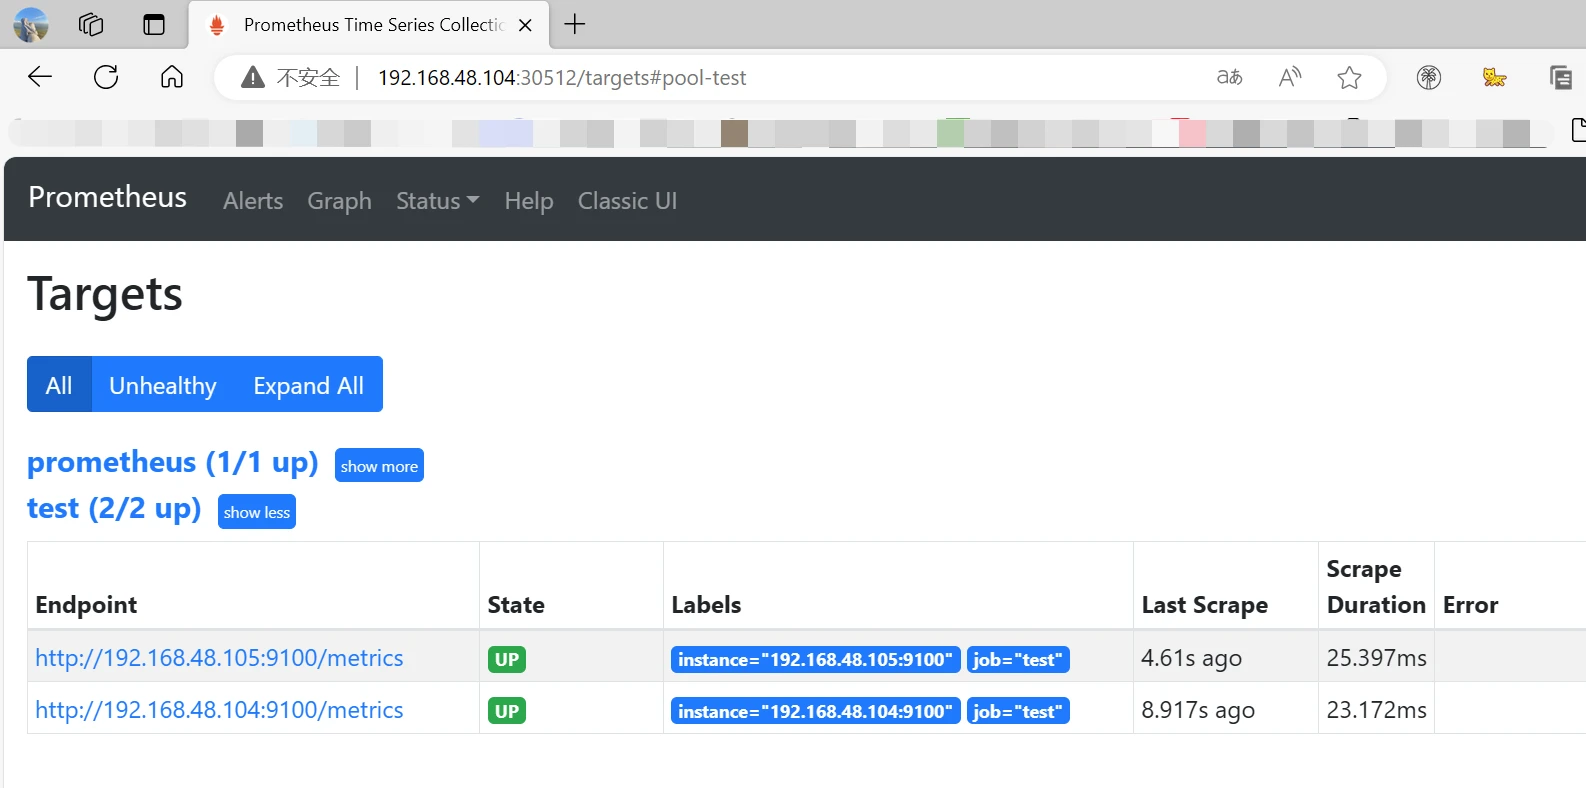
访问prometheus页面查看http://192.168.48.104:30512
可以看到有记录了
Grafana展示
展示数据需要配置仪表盘,仪表盘可以自己制作导入,也可以从官方下载使用。
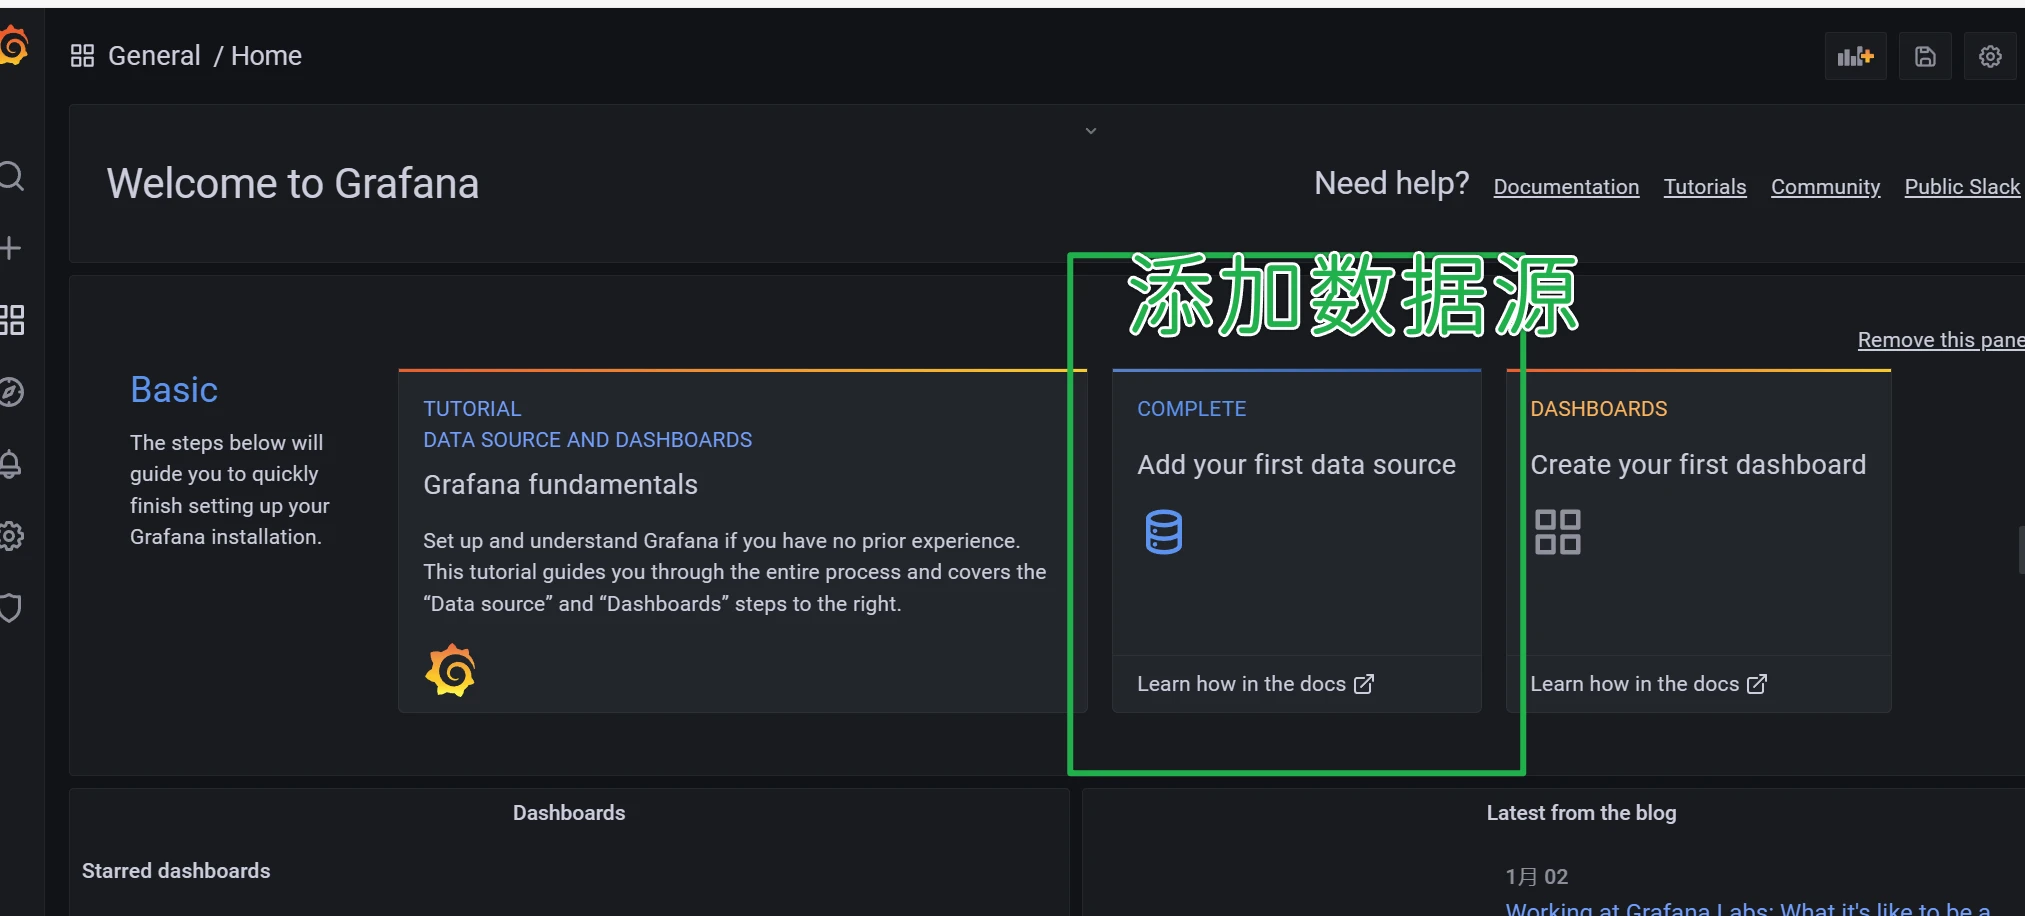
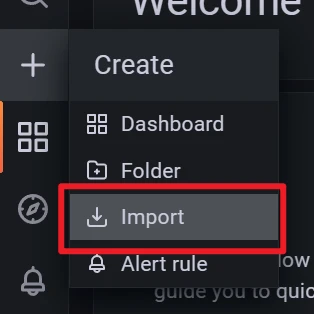
进入grafana http://192.168.48.105:31163
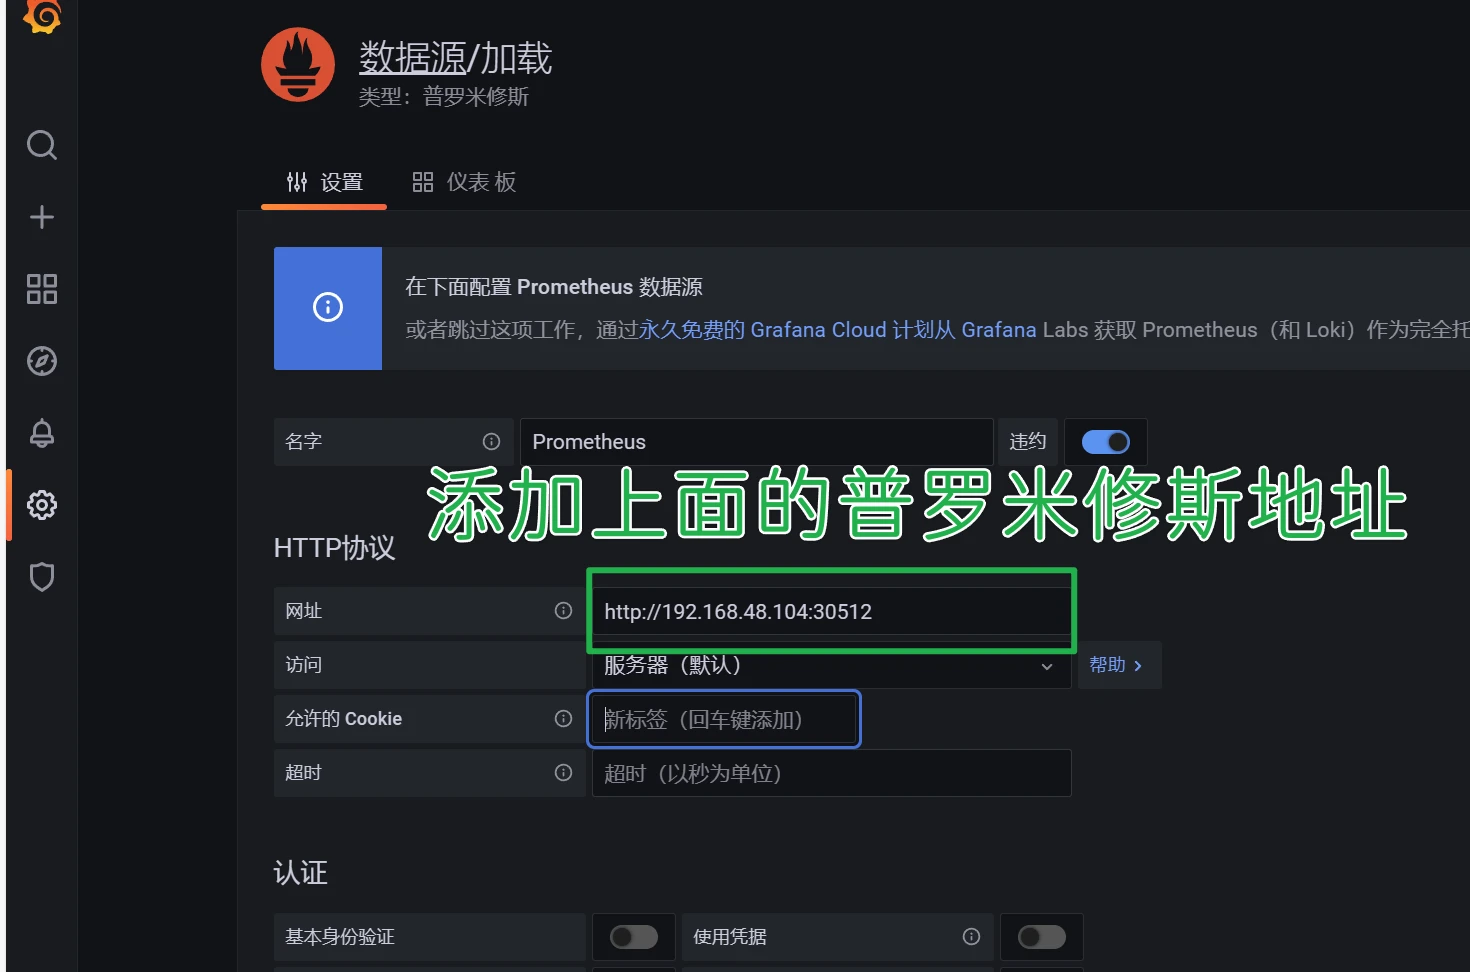
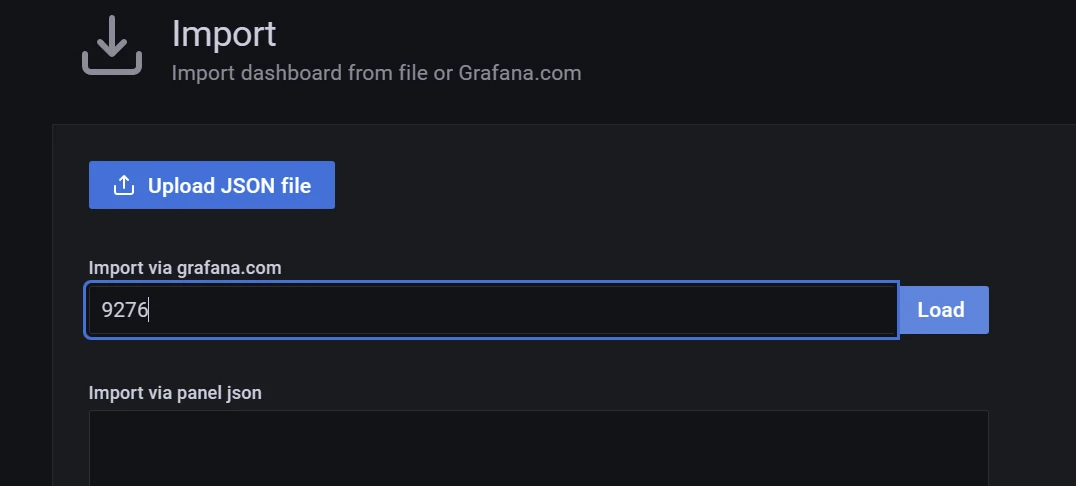
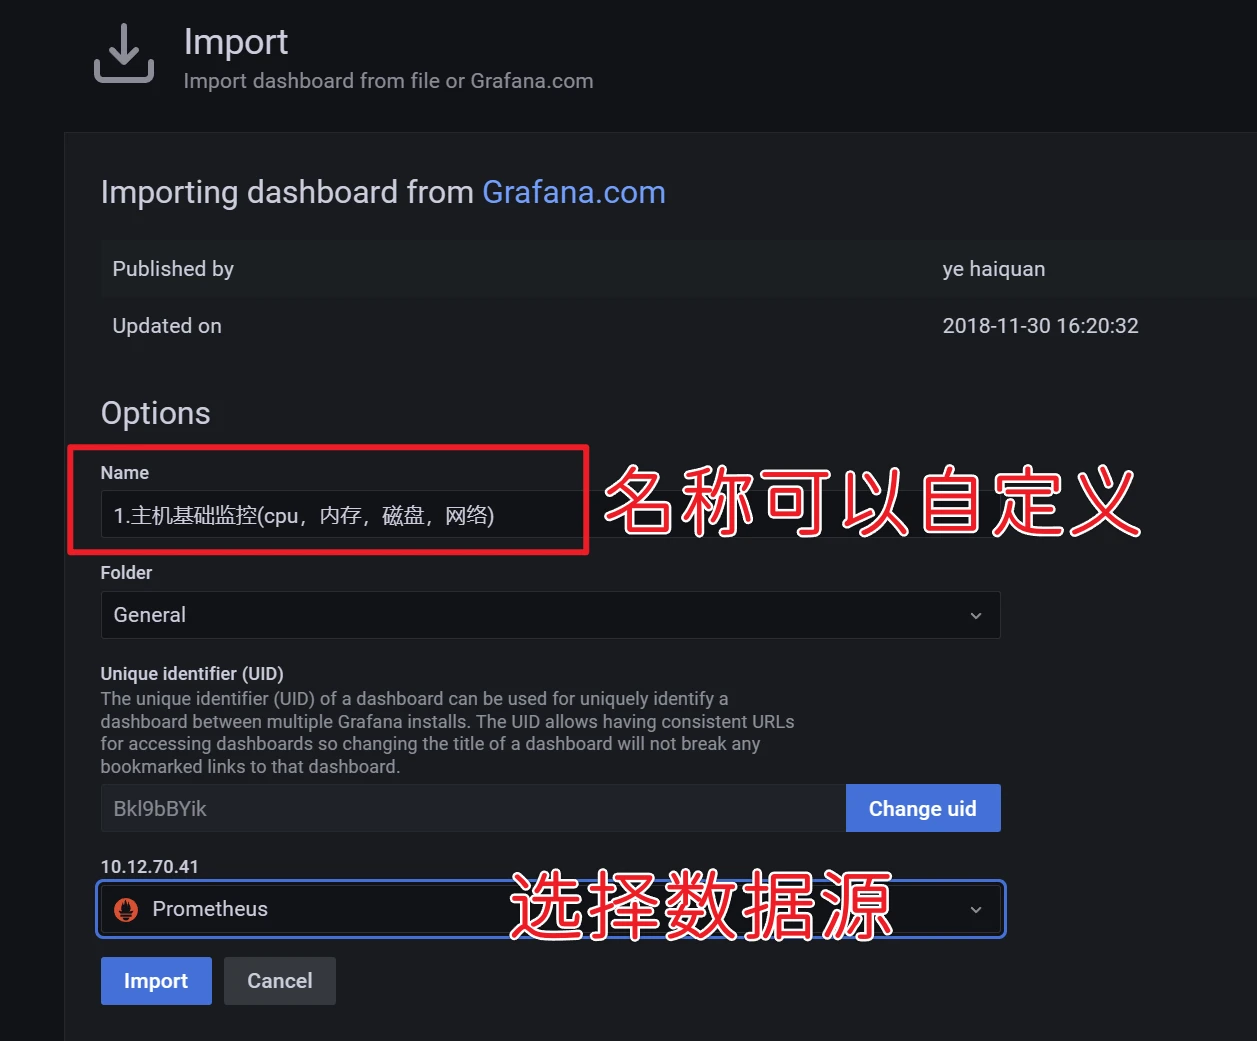
这里直接输入9276仪表盘id,然后点击load
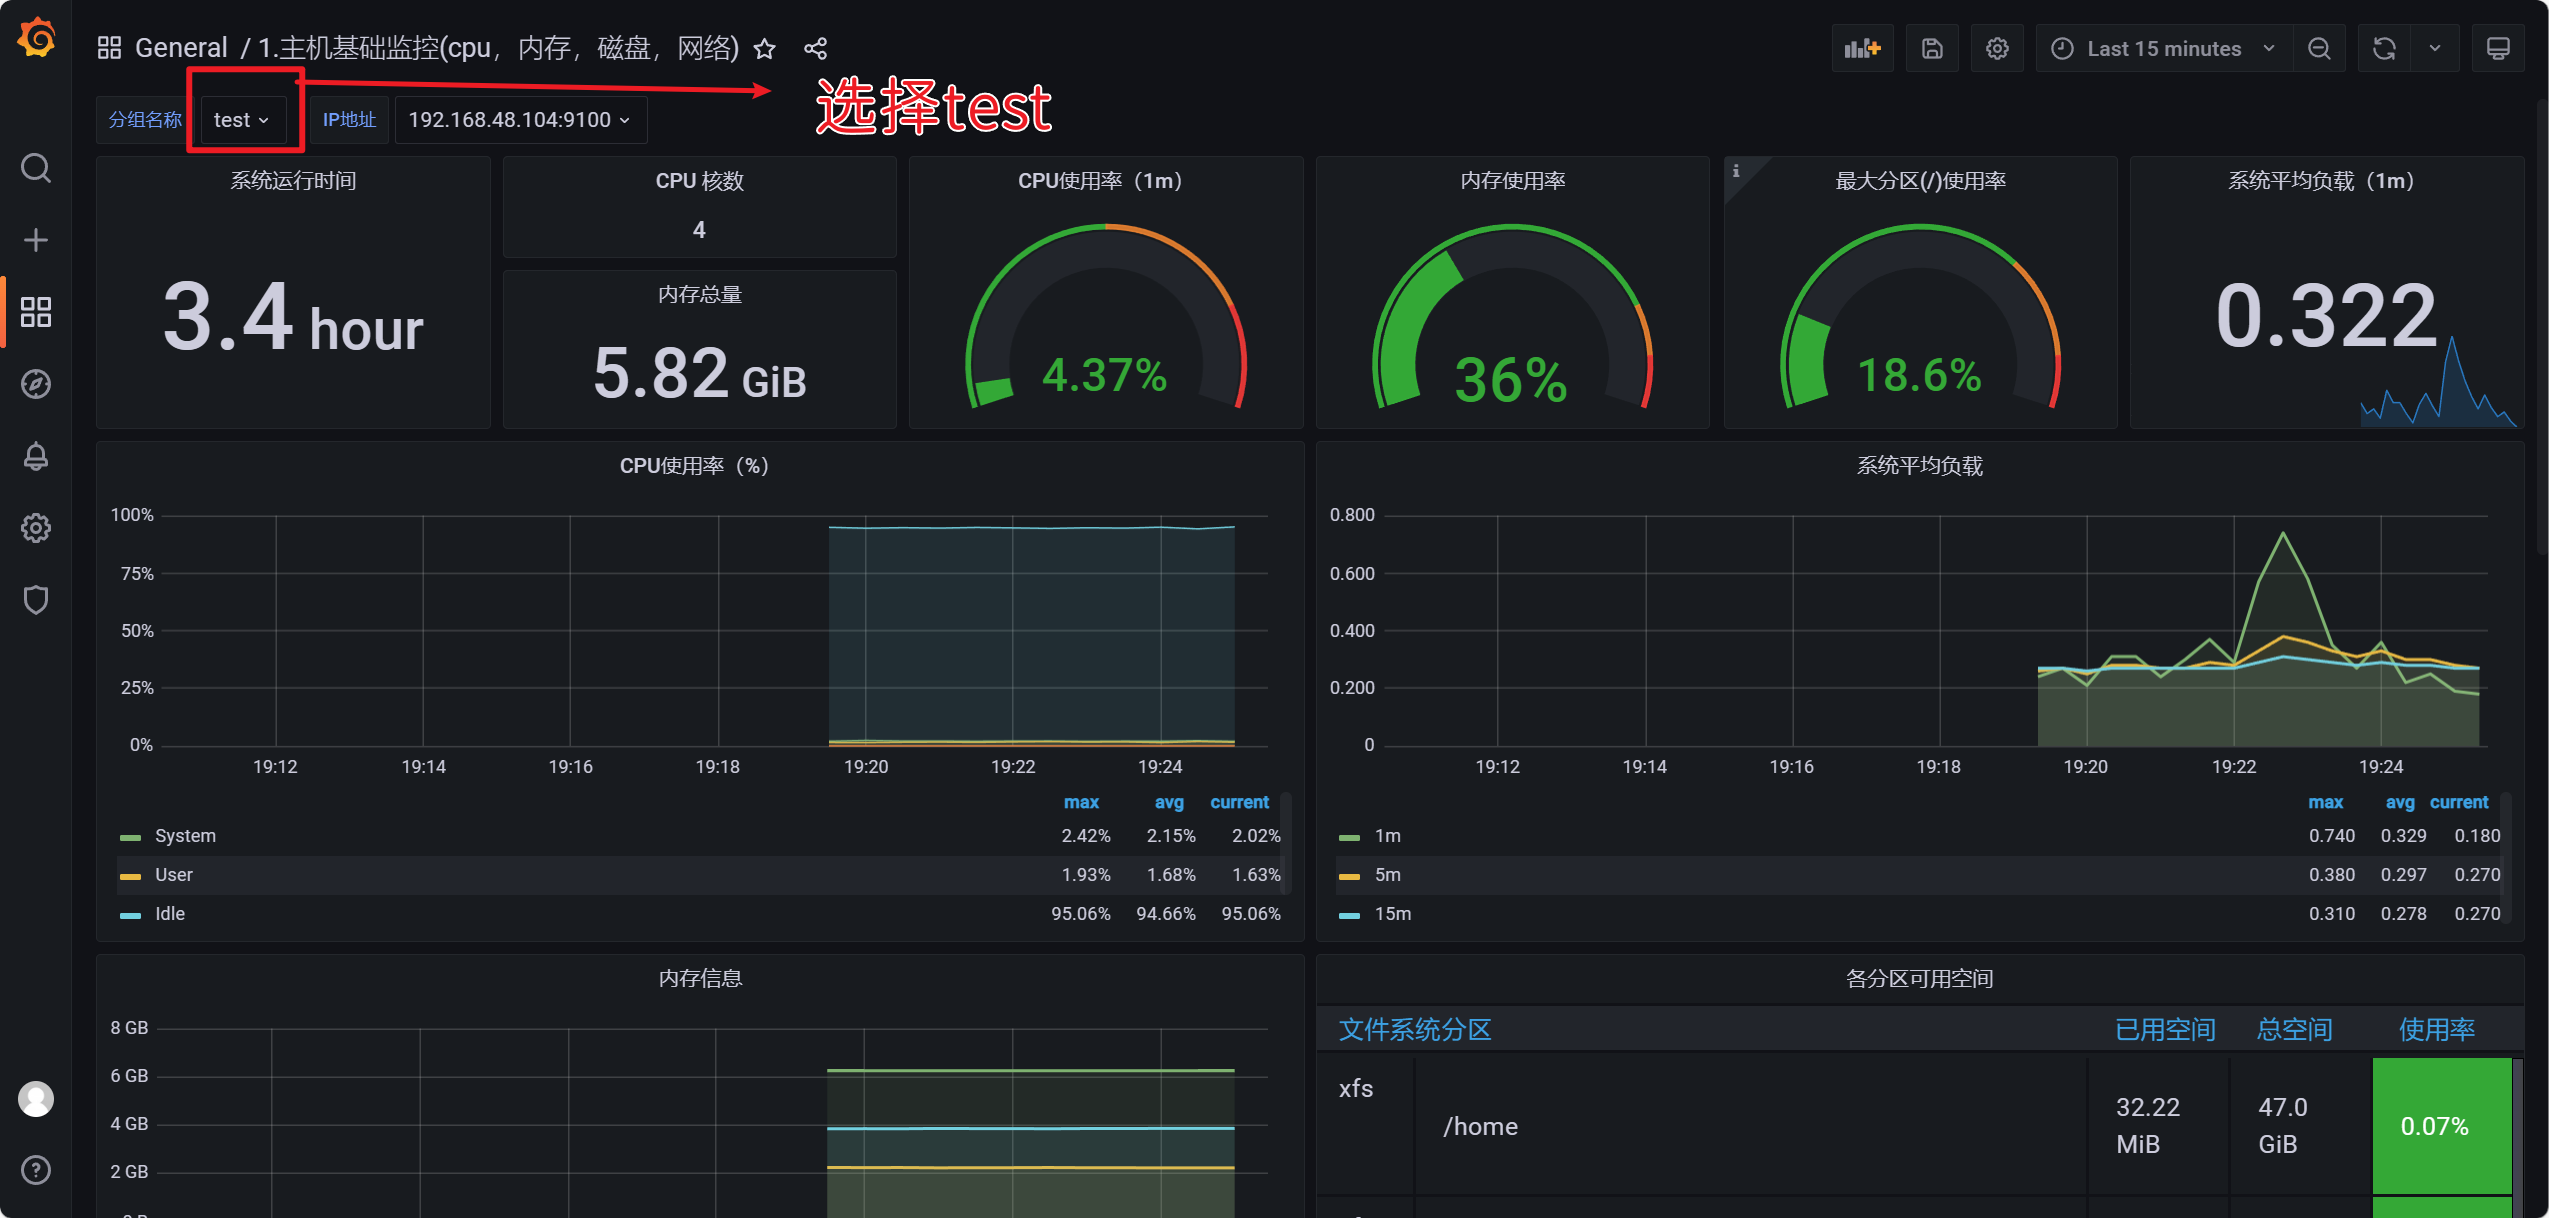
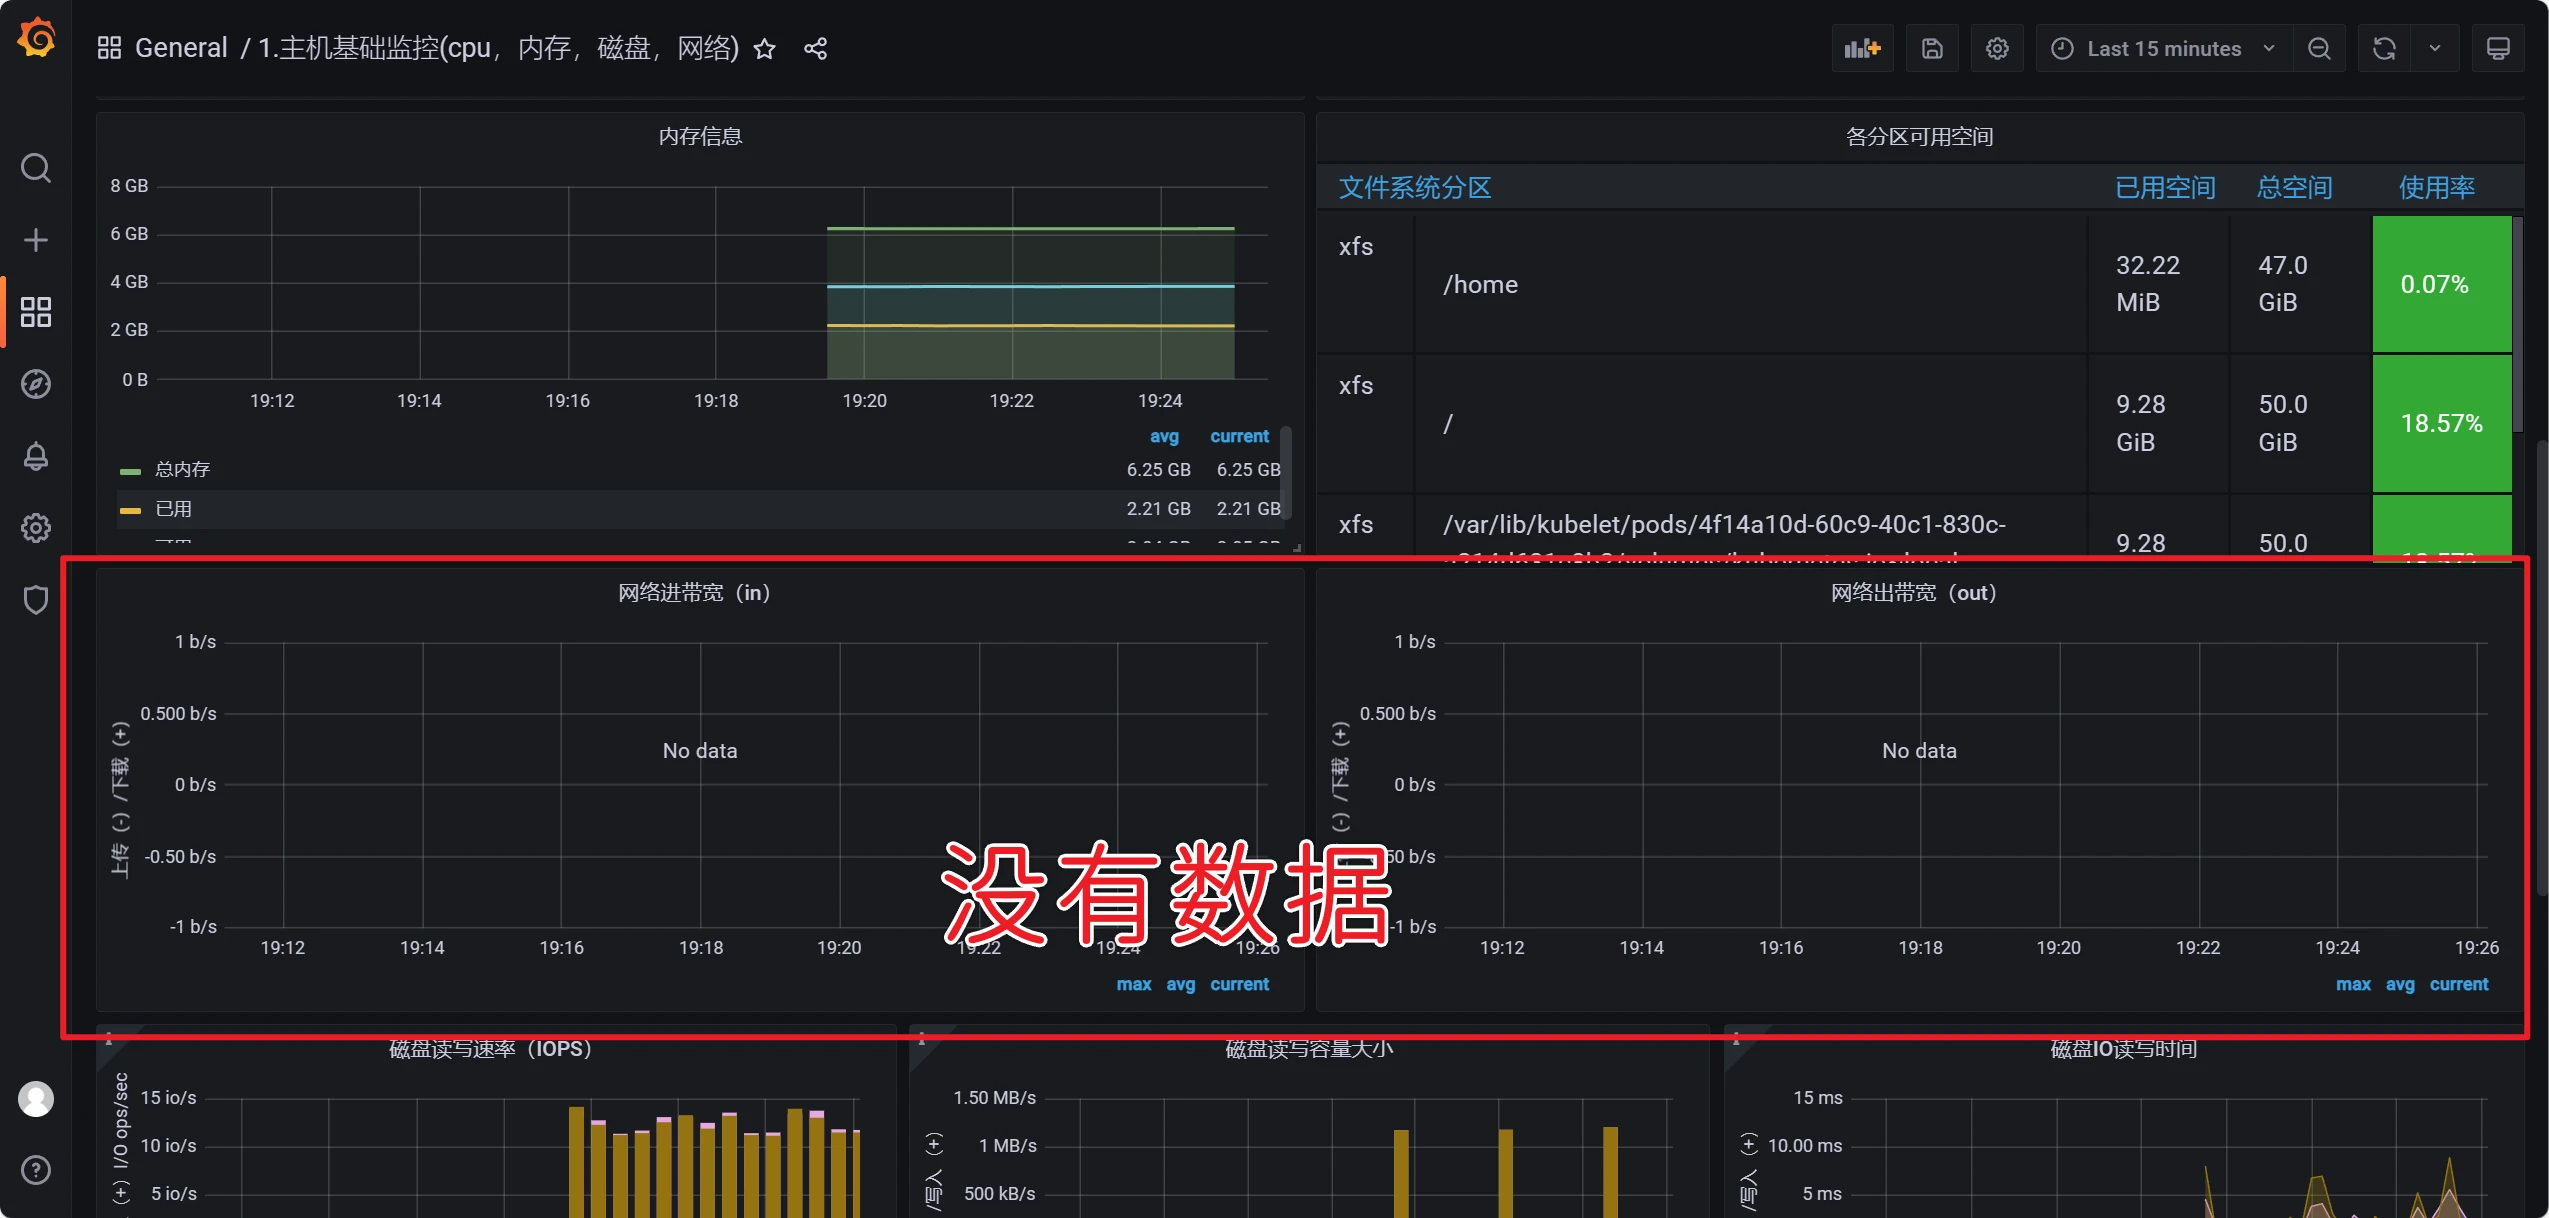
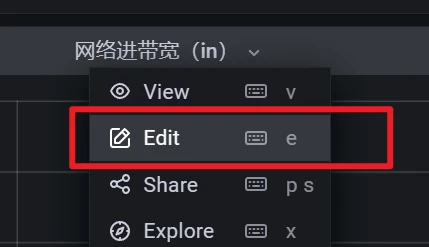
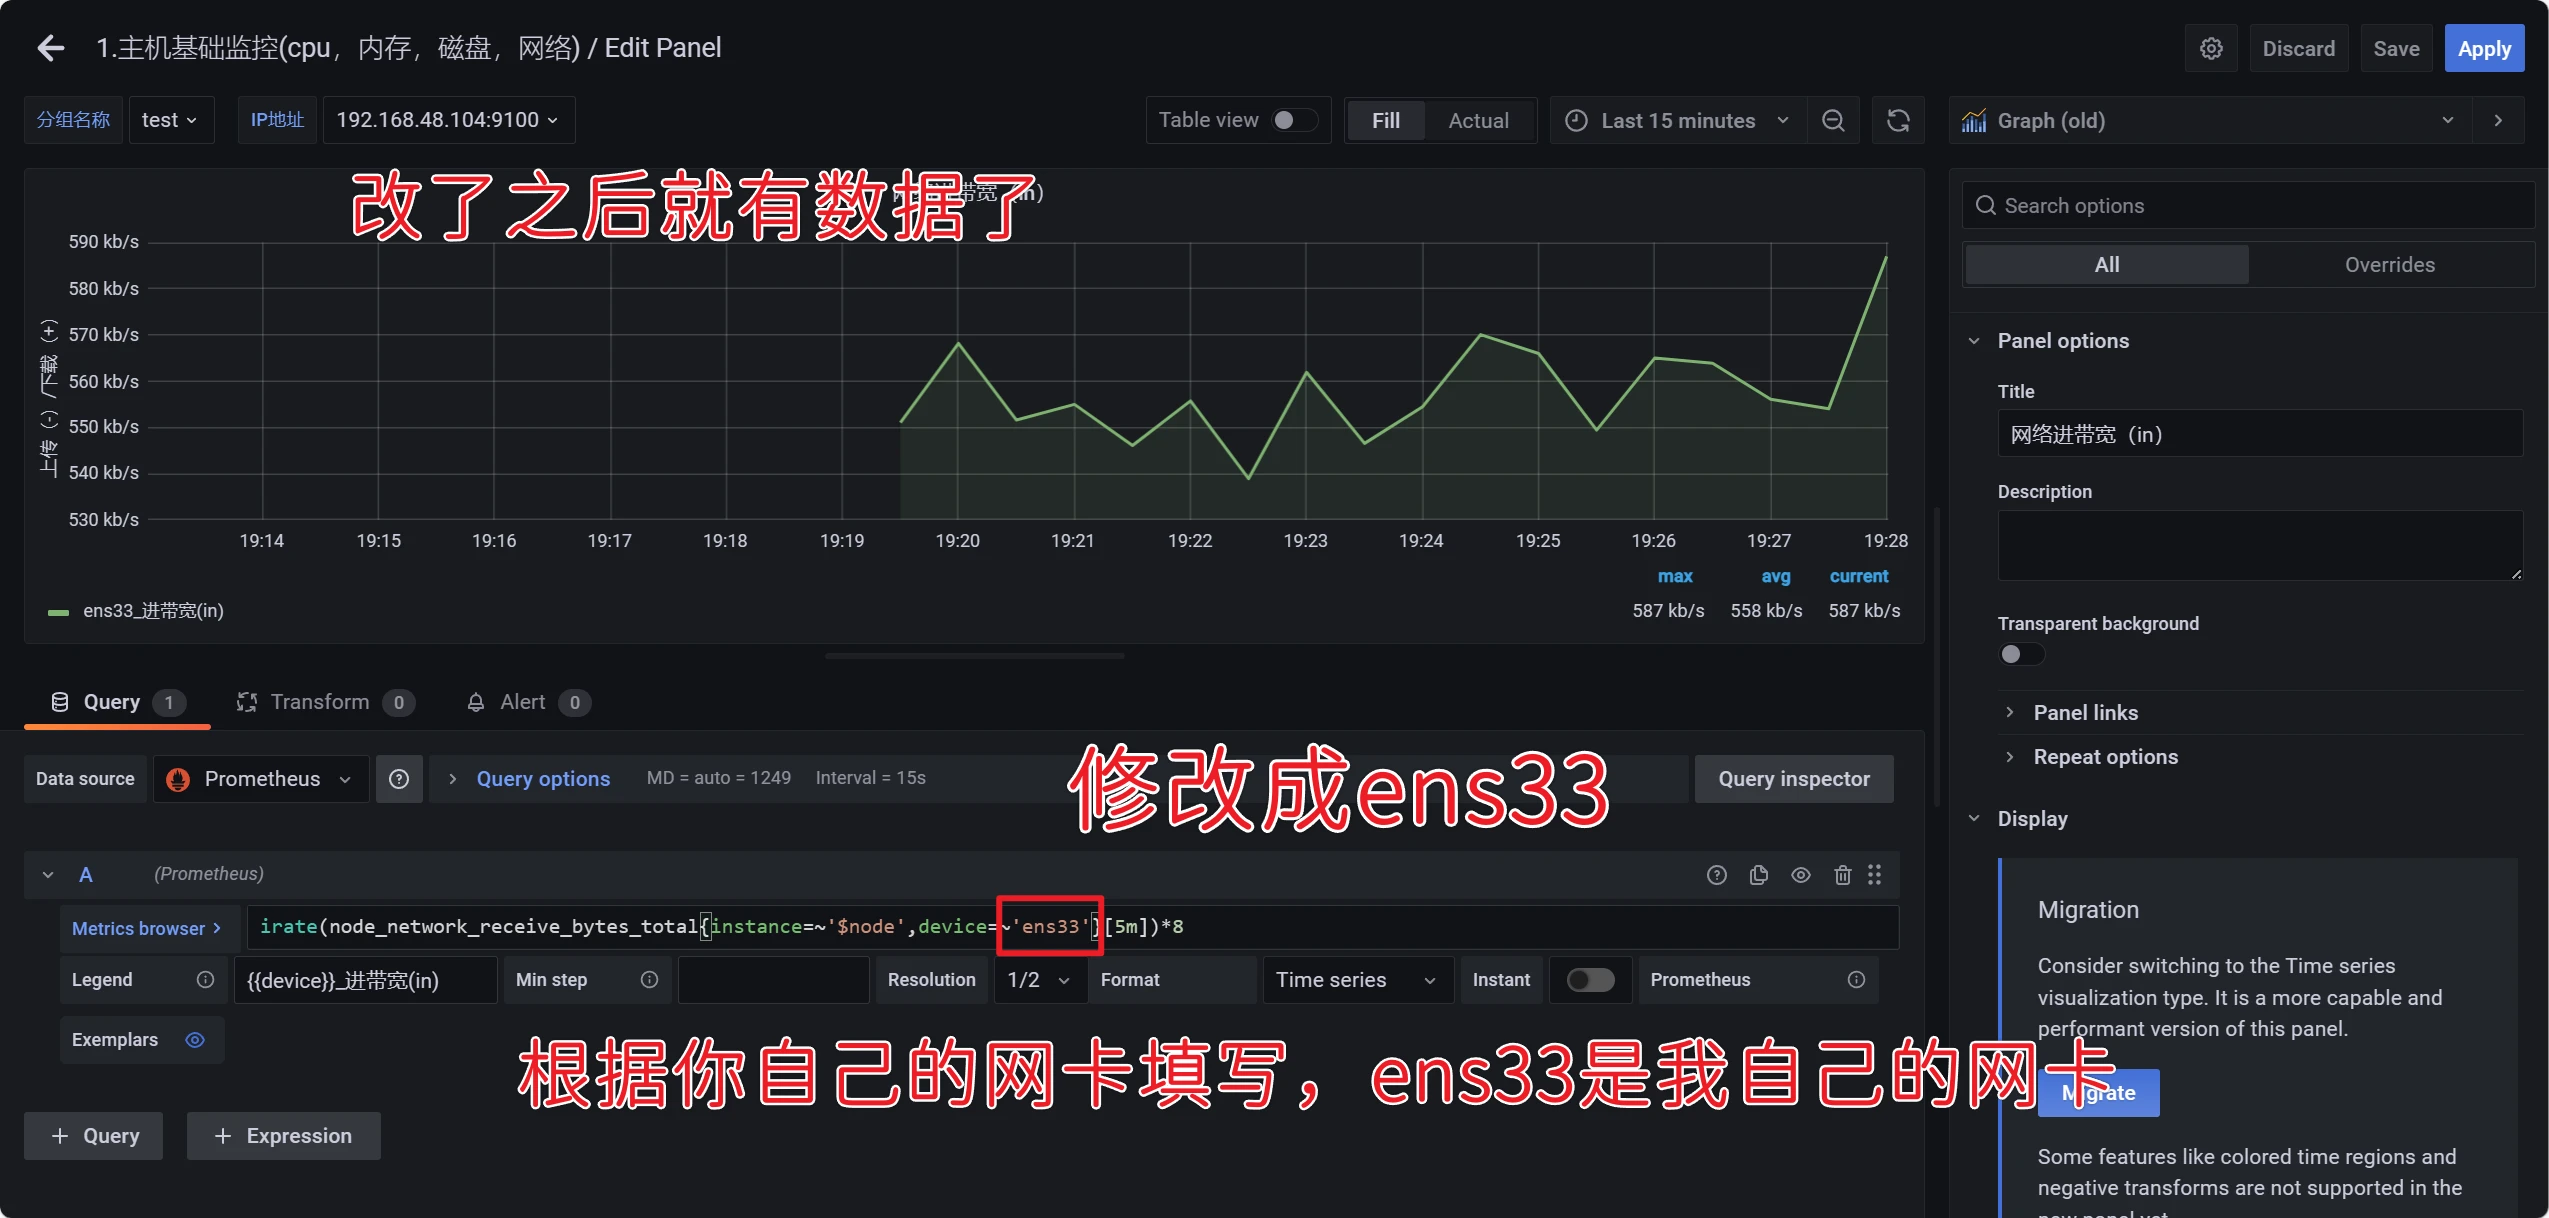
默认情况下网络这部分是没有数据的
点击右上角的save保存
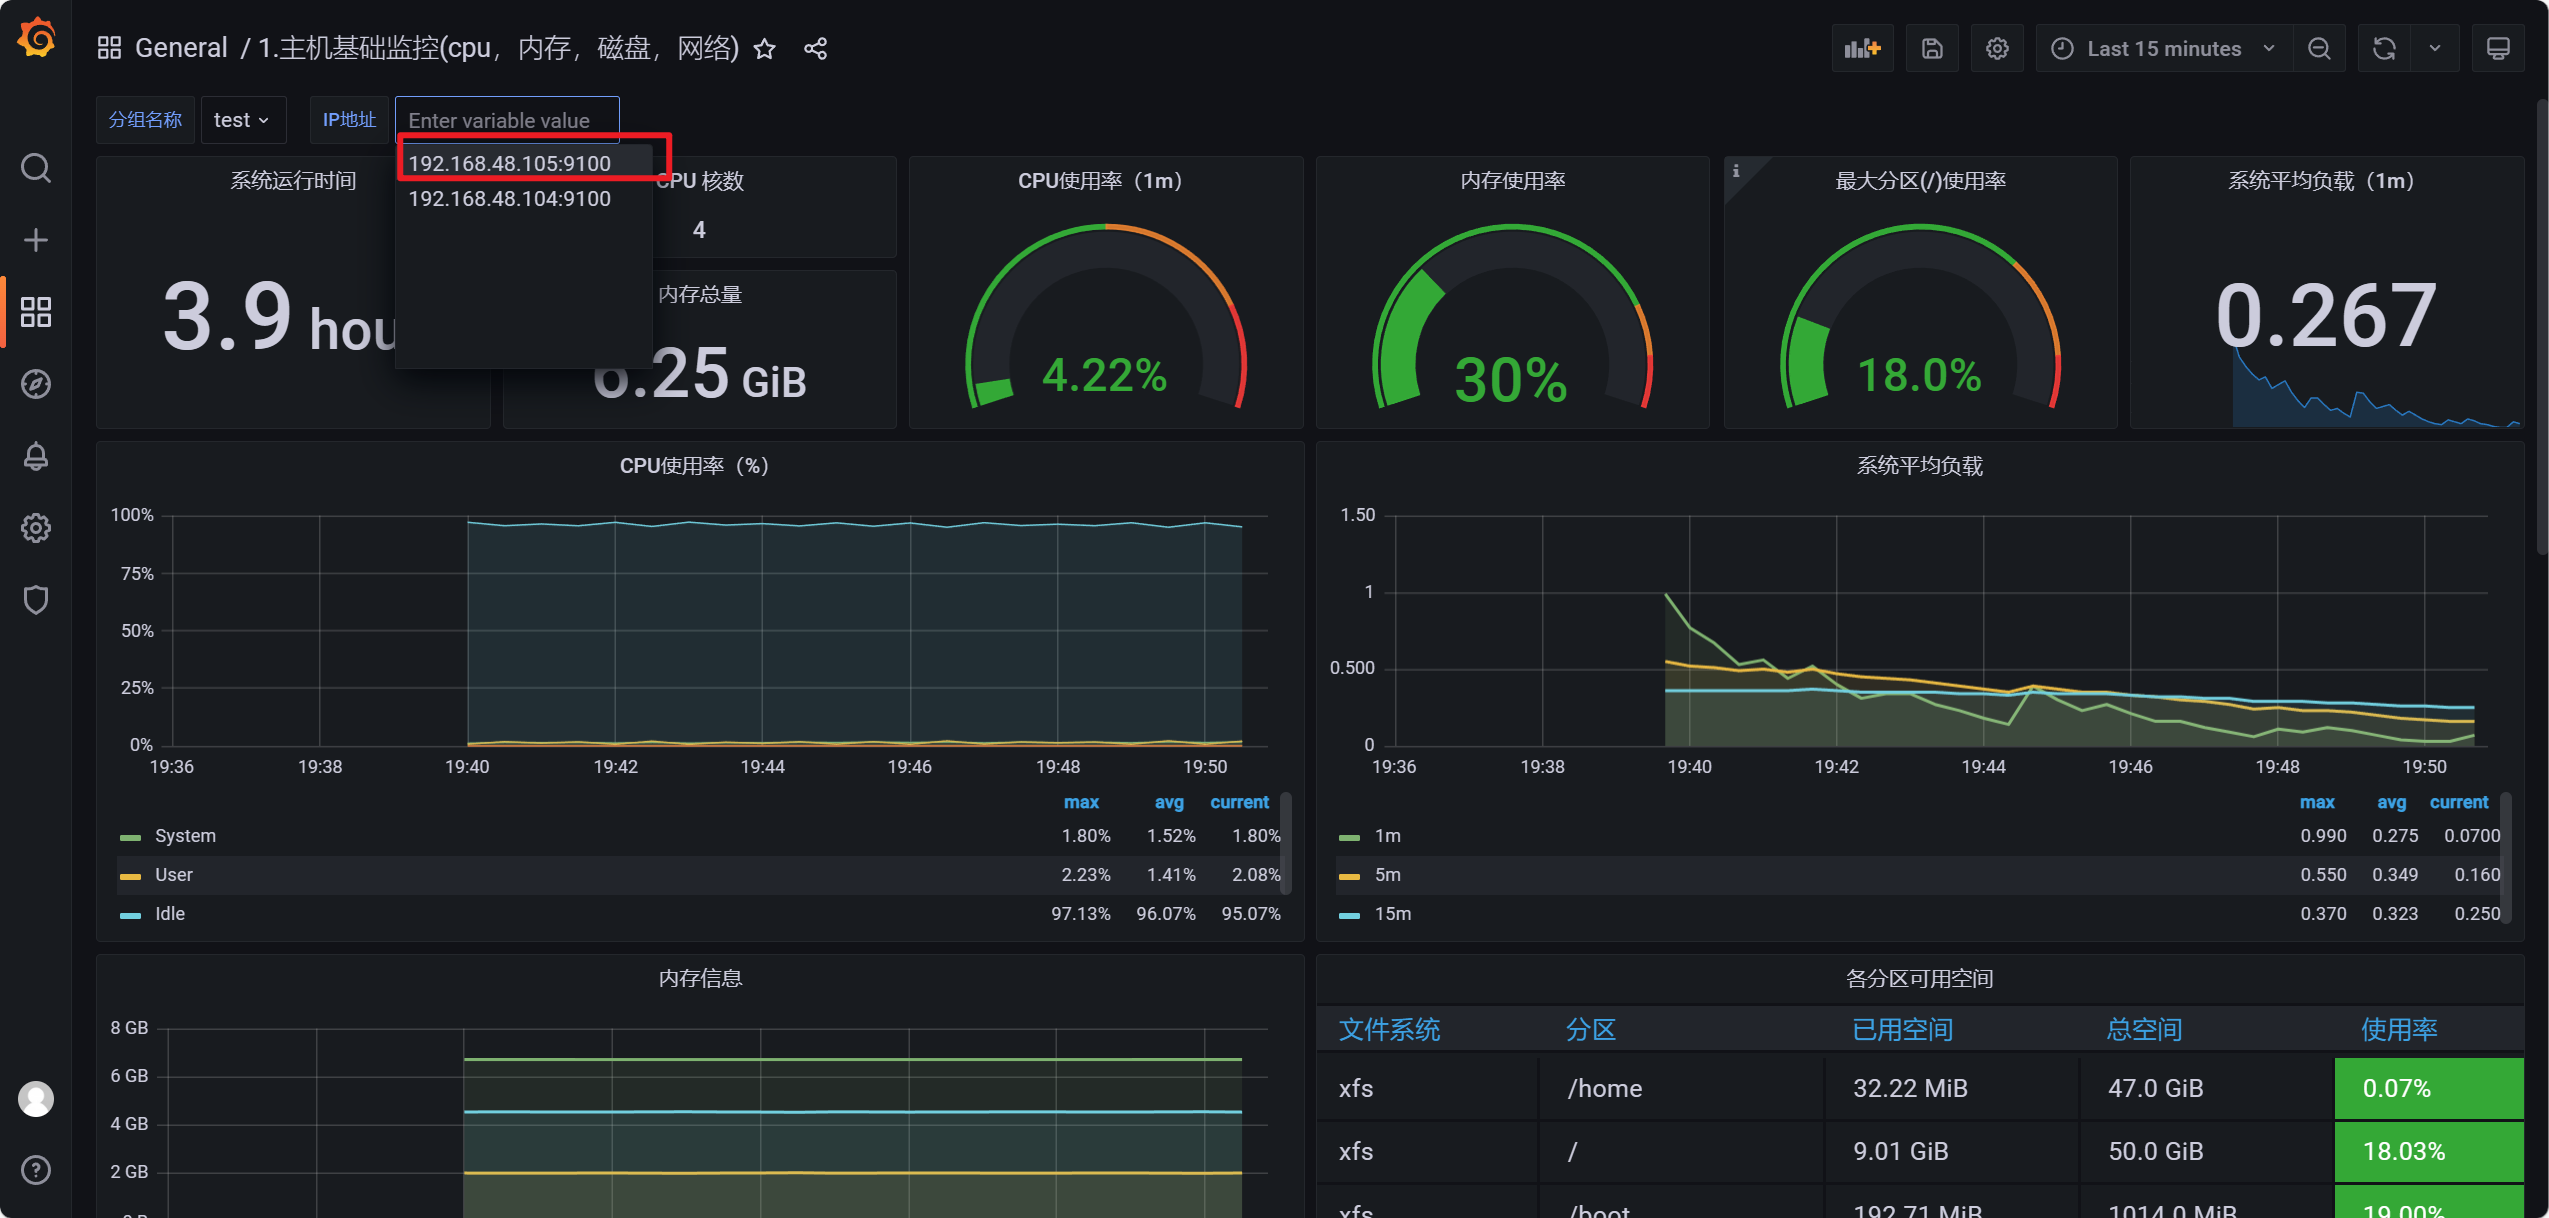
监控多台linux
远程复制到新增的机器
假设我还要监控node02
操作节点[node01]
1
2
scp -r /usr/local/node_exporter root@192.168.48.105:/usr/local/ scp /usr/lib/systemd/system/node_exporter.service root@192.168.48.105:/usr/lib/systemd/system/
操作节点[node02]
1
2
3
4
5
6
# 重新加载 systemctl daemon-reload # 启动 systemctl start node_exporter # 加入开机自启 systemctl enable node_exporter
添加采集器信息
操作节点[master1]
1
2
3
4
5
6
7
8
9
10
11
12
13
14
15
16
17
18
19
20
21
22
在Prometheus配置文件添加被监控端 cat > prome_cfg.yml << "EOF" apiVersion: v1 kind: ConfigMap metadata: name: prometheus-config namespace: prometheus-work data: prometheus.yml: | global: scrape_interval: 15s scrape_timeout: 15s scrape_configs: - job_name: 'prometheus' static_configs: - targets: ['localhost:9090'] - job_name: 'test' static_configs: - targets: ['192.168.48.104:9100','192.168.48.105:9100'] EOF kubectl apply -f prome_cfg.yml
热加载更新
操作节点[node02]
1
2
#实现Prometheus热更新 curl -X POST http://192.168.48.104:30512/-/reload
千屹博客旗下的所有文章,是通过本人课堂学习和课外自学所精心整理的知识巨著
